AI Segmentation for QGIS: The Complete Guide
Published Updated
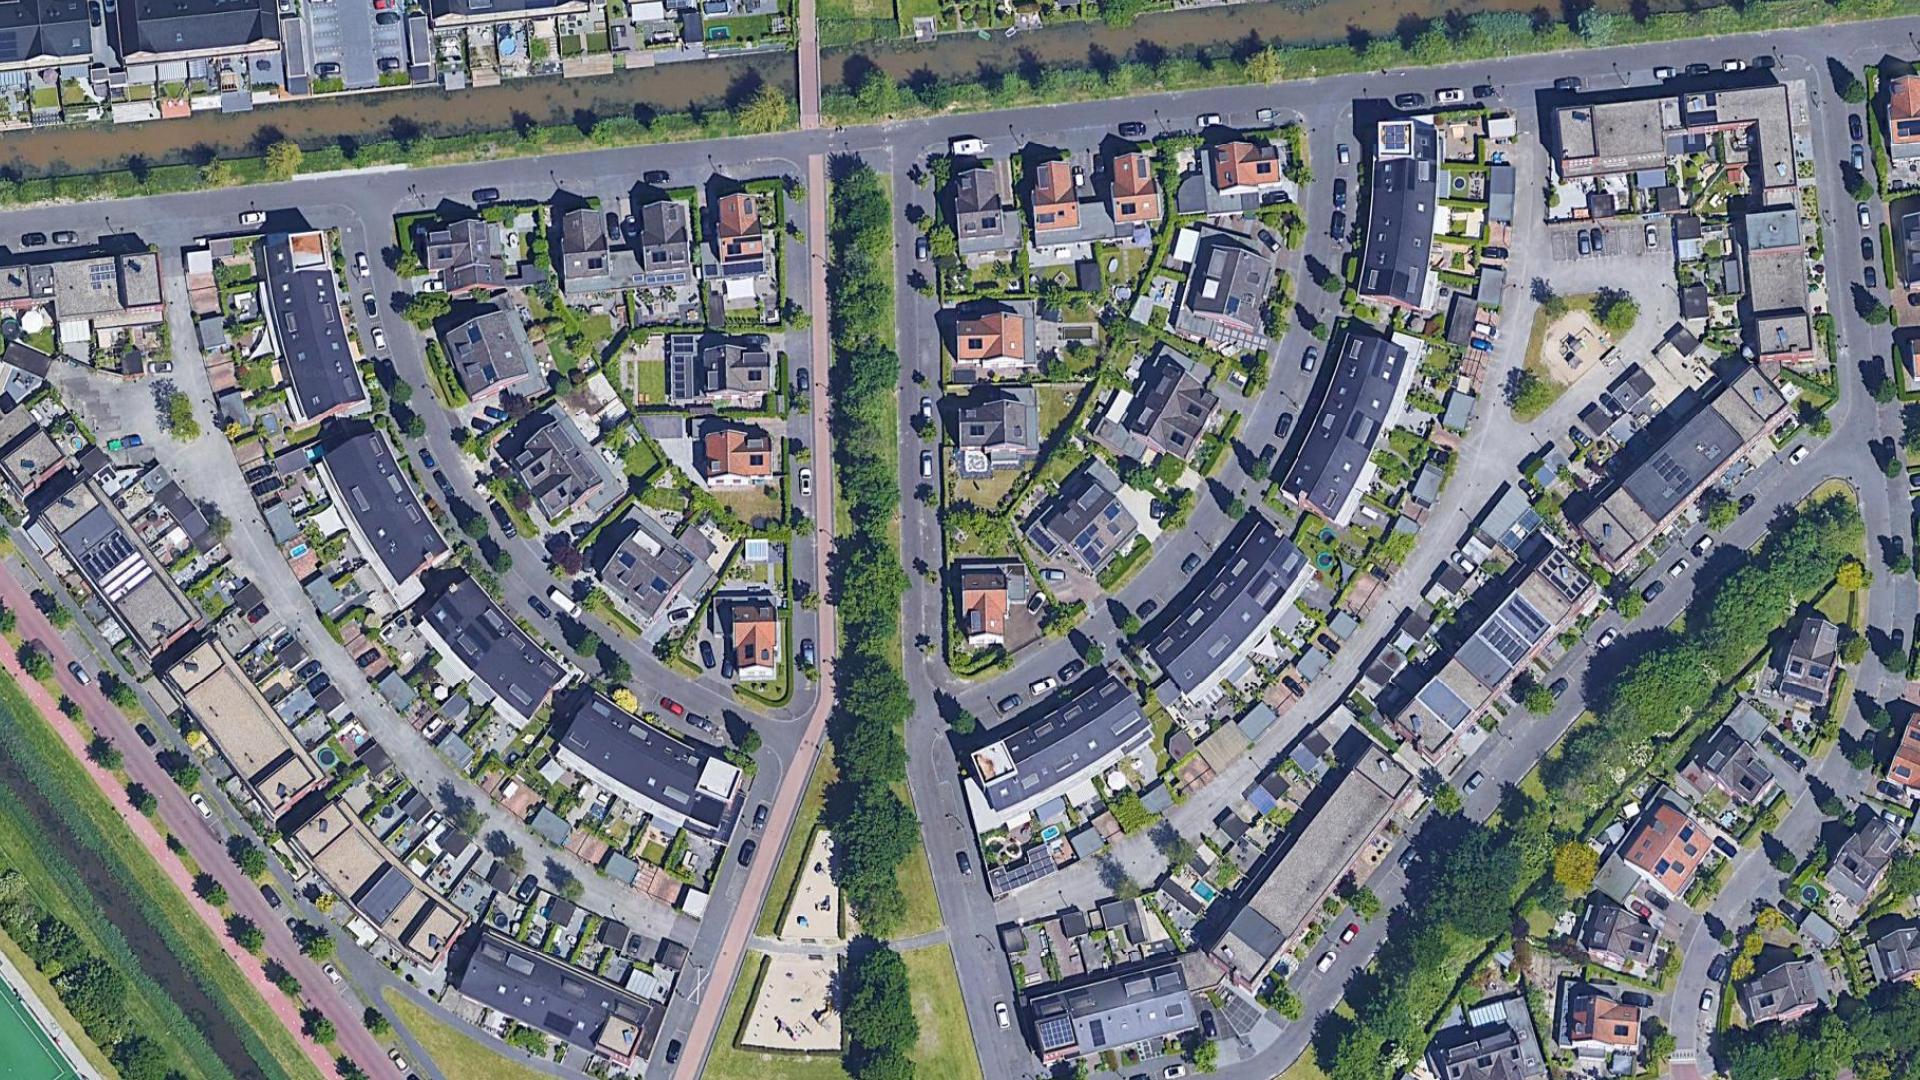
 Watch the video tutorial
AI Segmentation turns imagery you already have open in QGIS into clean vector layers. Draw a zone, type the object, and every match comes back as polygons you can edit and export. It runs on our servers, so it needs no graphics card and nothing heavy to install. We build it, so this guide is about our own tool.
 into clean vector layers. Draw a zone, type the object, and every match comes back as polygons you can edit and export. It runs on our servers, so it needs no graphics card and nothing heavy to install. We build it, so this guide is about our own tool.
It works two ways.
Automatic
Every object in a zone, at once
- What it does
- Draw a zone, name an object, get every instance.
- Where it runs
- In the cloud. Nothing heavy on your machine.
- What it costs
- Counts the ground it covers, shown before you start.
- Use it for
- Hundreds or thousands of objects over an area.
Semi-Auto
One object per click
- What it does
- Click an object. The AI outlines it, you save it.
- Where it runs
- On your computer after a one-click setup, or on ours. You pick.
- What it costs
- Free on your computer with no counter, and it works offline.
- Use it for
- Ten exact objects, or a boundary you control.
This guide walks Automatic live in QGIS, then the review, where you tune the layer without paying for a second run.
Install and sign in
In QGIS, open Plugins -> Manage and Install Plugins, search for AI Segmentation, and install it. The panel opens on the right.
Sign in from the panel and you are ready. Both modes are free to start: Automatic covers a free area of ground every month, and Semi-Auto runs on your own machine with no counter at all.
A switch at the top picks the mode, and below it you choose the raster.
Automatic: your first run
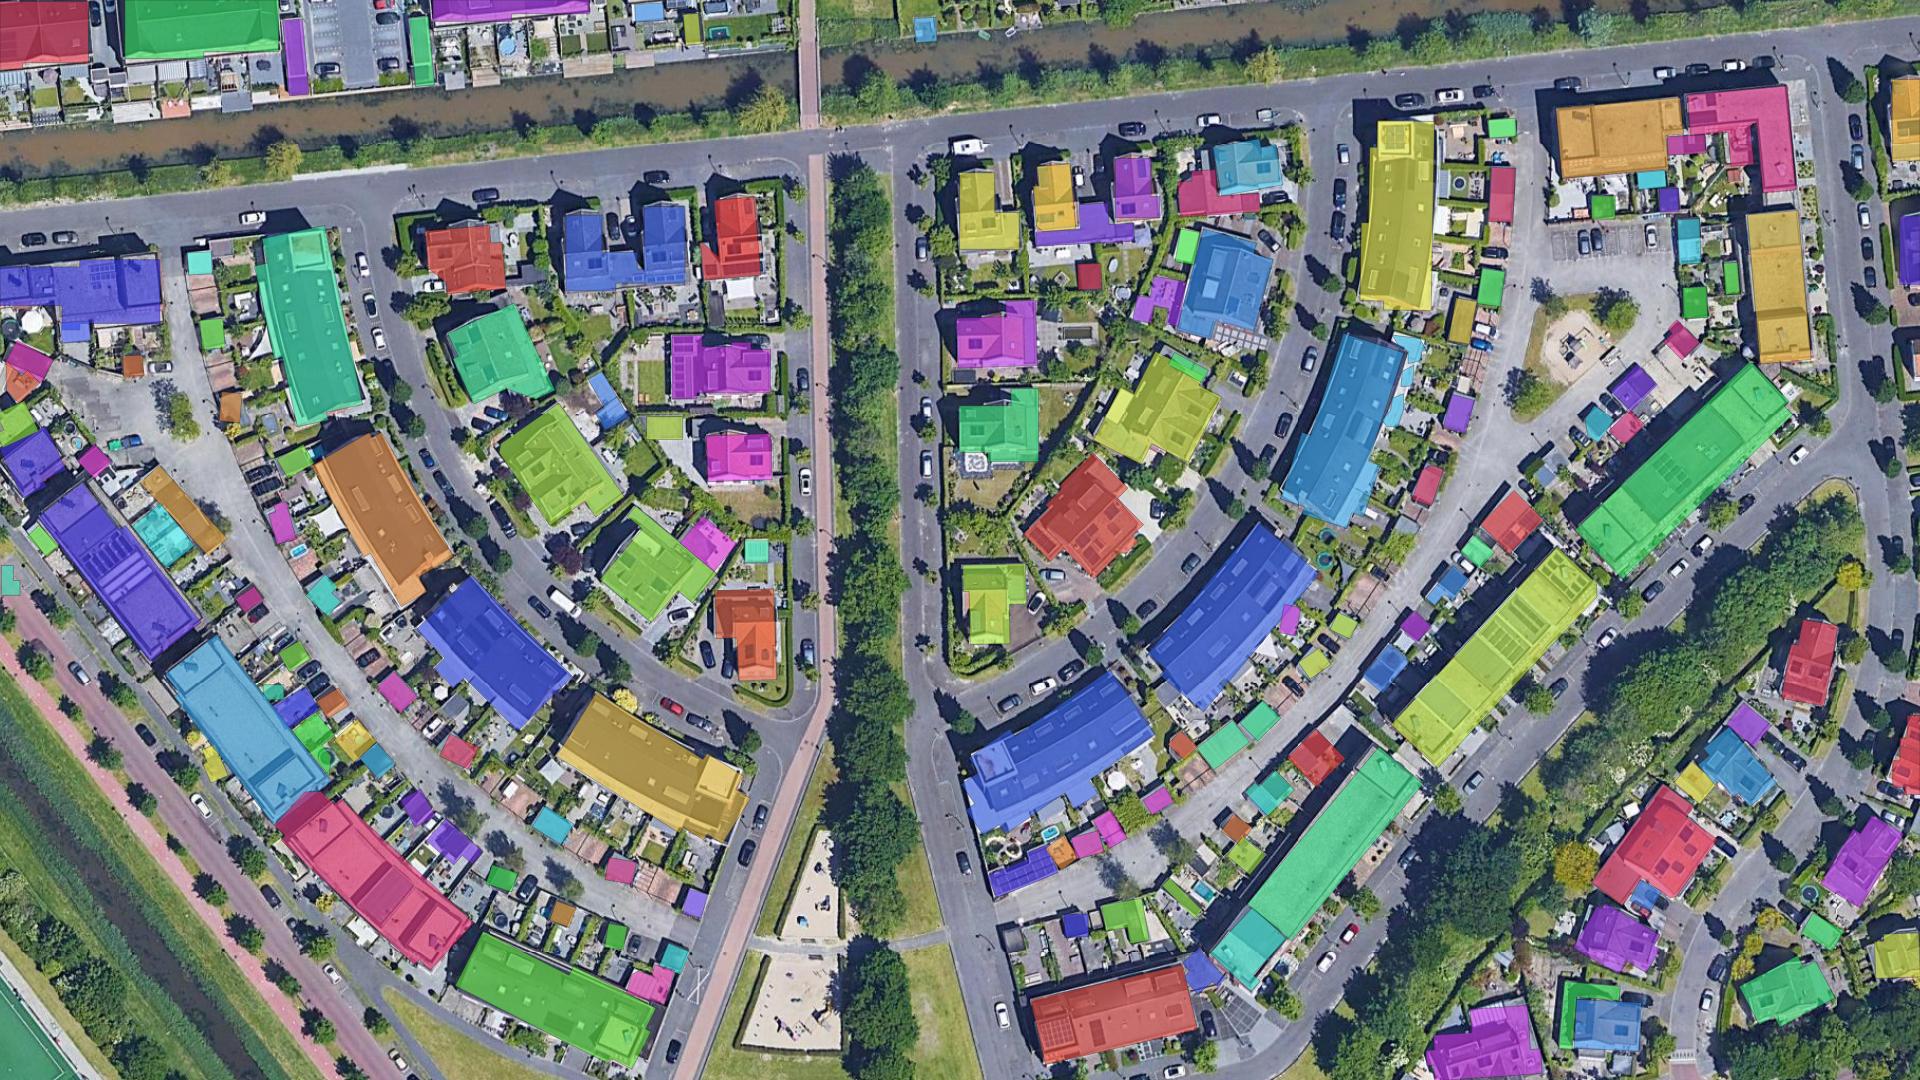
Goal: pull every building footprint out of a residential neighbourhood, in one run. Here it is end to end, from an empty panel to detections on the map. If the neighbourhood is already mapped, check the open data first: the free building footprint downloader shows what OpenStreetMap, Microsoft and Google hold for a box you draw.
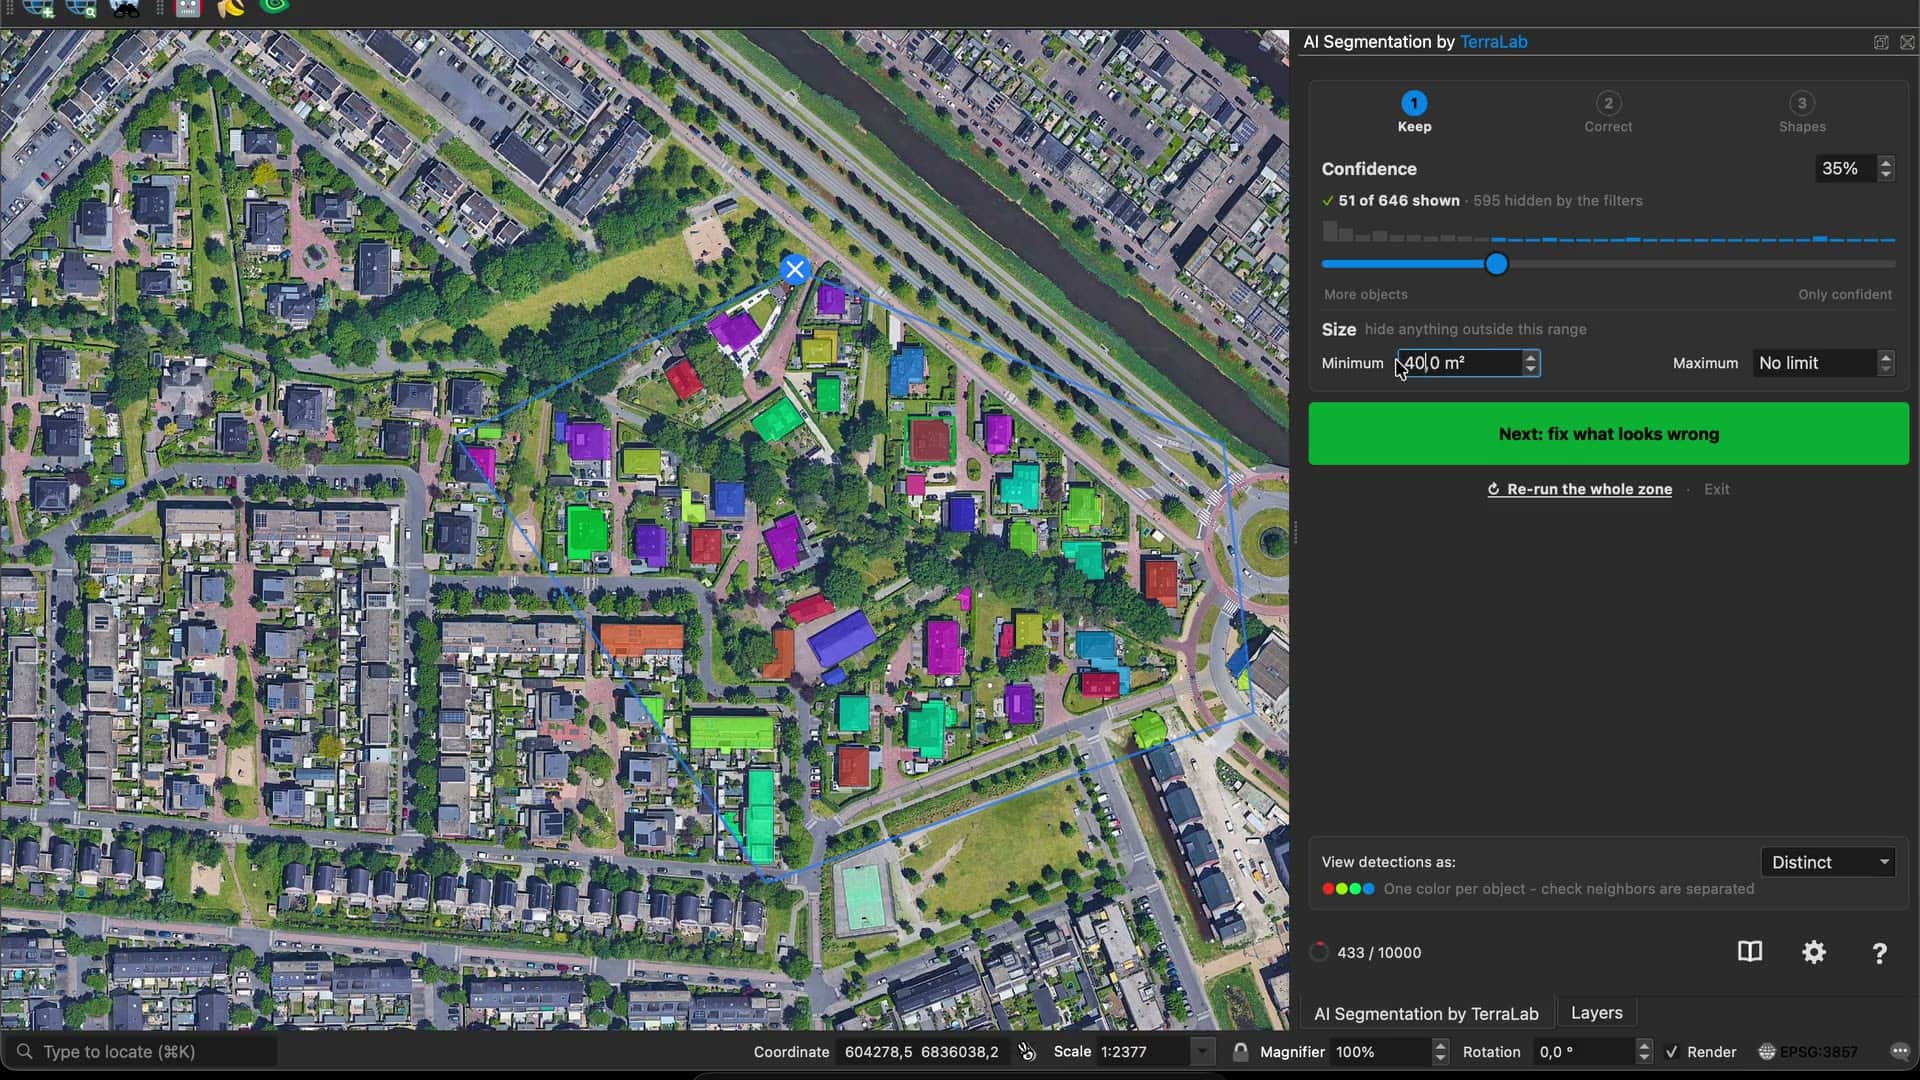
The five steps behind that clip, one at a time.
Pick your imagery and start
Choose the raster, then click Start Automatic AI Segmentation. The layer locks for the run, so nothing shifts under you halfway through.
Draw your zone
Click around the area and close the loop on the first point. Any shape you like: a free account covers 1.5 km² of ground a month, and Pro covers 200 km² with no limit on the zone you draw. Backspace undoes a point.
Describe what to find
One or two words: building, tree, car. This is the step where a first run goes wrong, so the Library next to the box lets you pick from real before/after previews instead of guessing.
Show what it looks like
One word is not always enough. Draw on the map outlines one object from your own imagery and the AI looks for the look-alikes. Up to three examples, and two work better than one.
Set the Precision
Your zone is cut into tiles, each detected at full resolution then stitched back seamless, so an object crossing a seam comes out whole. More precision means smaller objects found and more ground counted. The panel shows what the run covers before you start it.
The whole setup fits in one screen before you spend any of your allowance. Above the Library templates sit your own runs: Recent with its object and tile counts, Favorites for the ones you starred. Reopening one brings its wording back.
Then click Detect objects. Tiles go out, polygons draw on the map as they come back. This run returned 646 candidates.
The review: three steps, walked in any order
Detection opens a review rather than a finished layer, and most of the work happens here. The green button names the next step, but nothing forces that order.
1Keep
Which objects survive
- Confidence
- Min / max size
2Correct
Fix one polygon at a time
- Edit by AI or by hand
- Add, merge, delete
3Shapes
How every outline looks
- Right angles, fill holes
- Points, trim, grow
Go back to any step, in any order. Instant, and free.
1 Keep: decide which objects survive
Every detection carries a score. Confidence sets the floor, Size hides anything outside a ground-area range, and the line under the header counts what survives: 51 of 646 shown · 595 hidden by the filters. Anything you fixed or drew by hand survives both sliders.
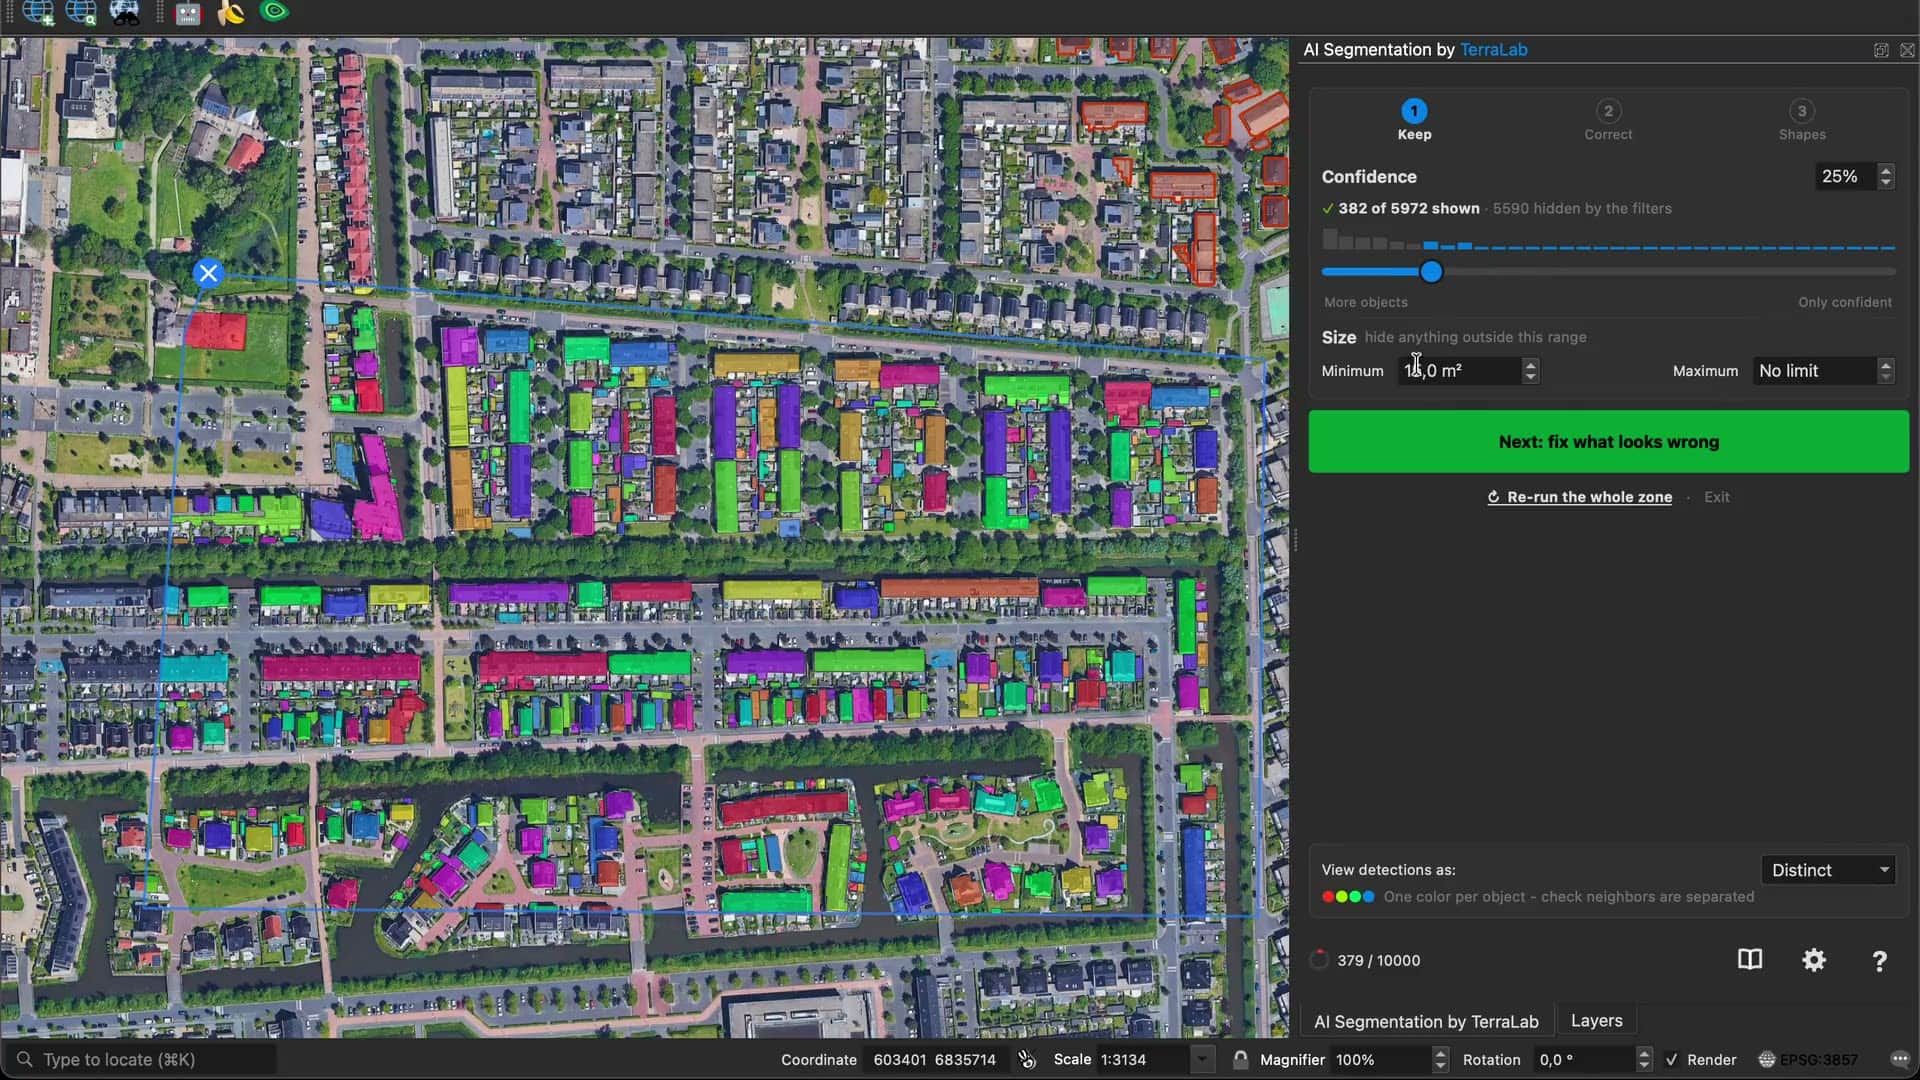
Almost everything the two sliders throw away is small, low-scoring, and not your object.
2 Correct: fix one polygon at a time
Click a polygon and it opens on its own. Nothing else on screen moves while you work.
A switch at the top picks how you fix it. It reads AI | Manual, and here Manual just means "by hand, on this one polygon".
The AI method uses the model on your machine. Click the spot it missed and the outline grows, right-click a part it grabbed and the outline retreats.

The by-hand method hands you QGIS's own digitizing tools on that polygon, with Move points, Redraw edge and Split.
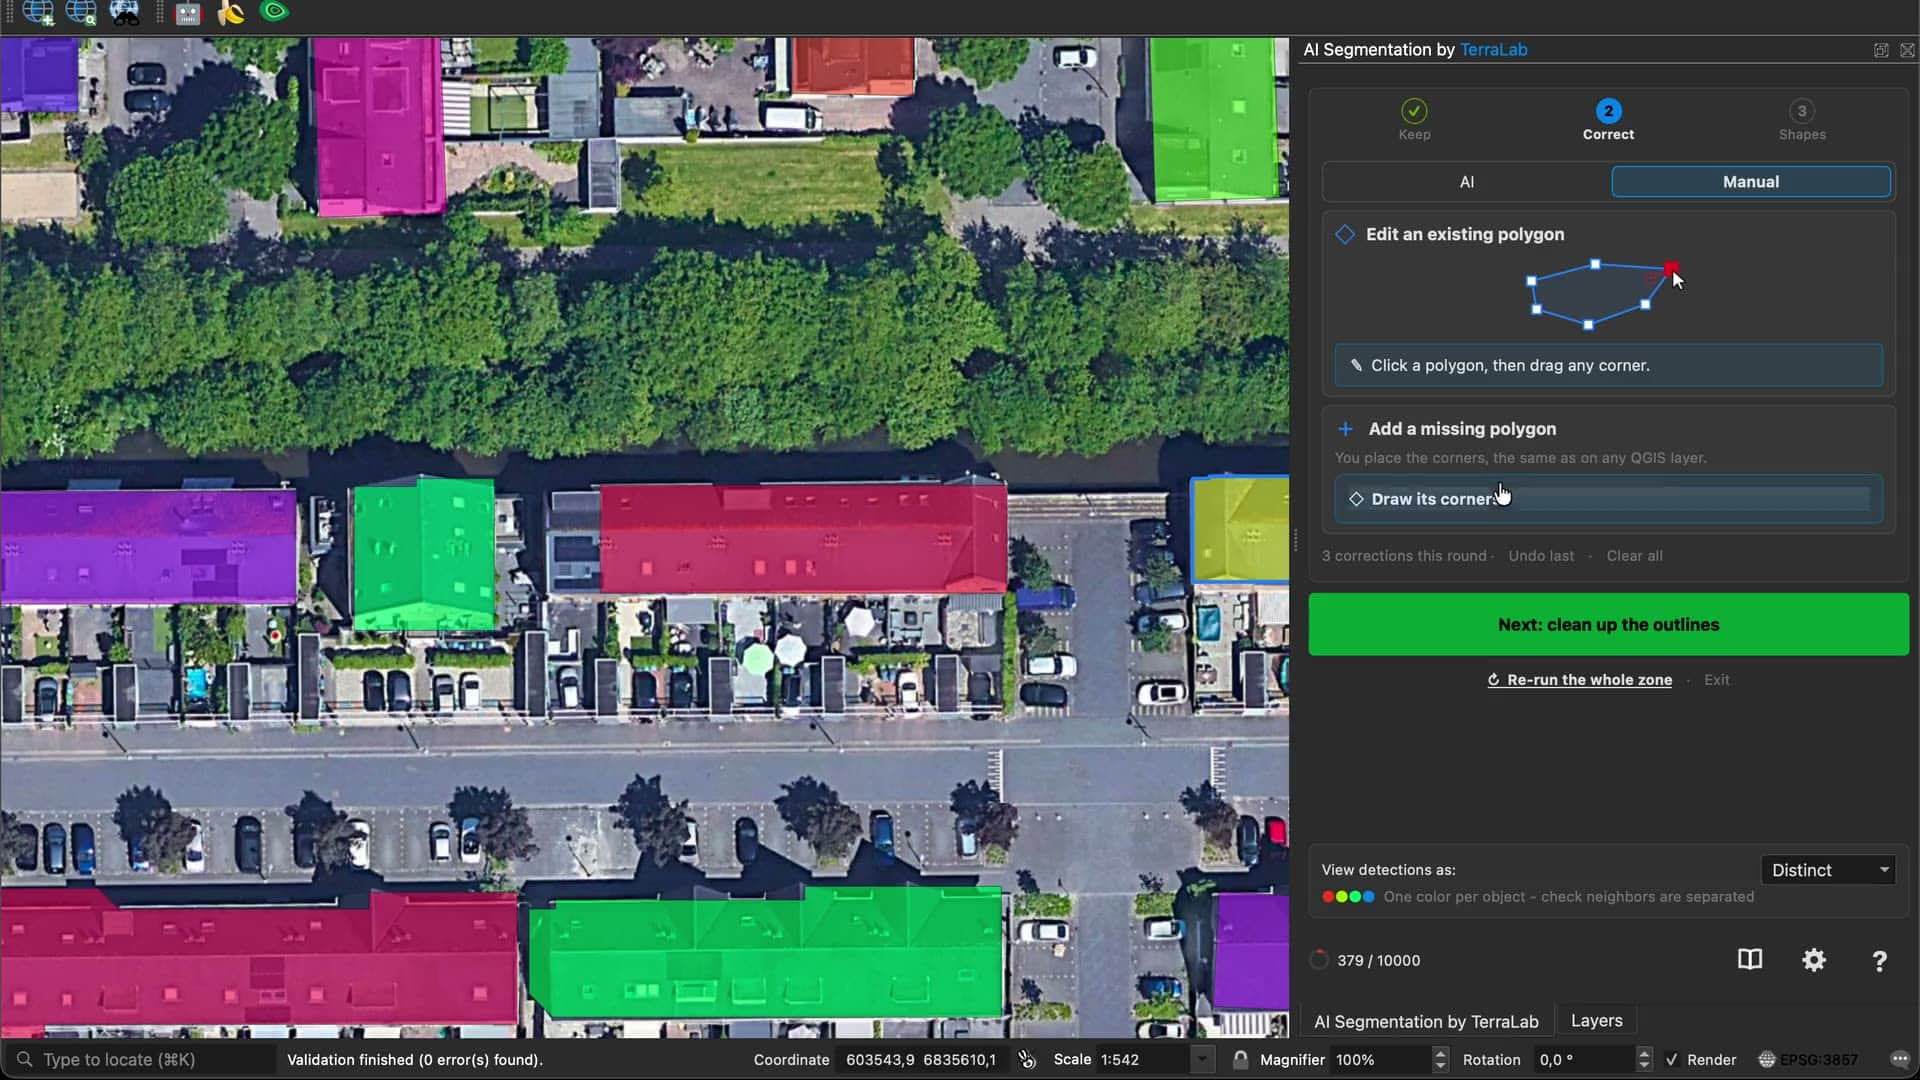
The same step also handles what is missing and what should not be there.
- Add a missing polygon. Point at an object the run never caught and the local model outlines it, free. Or draw its corners yourself.
- Merge with neighbours joins a building the model split in two.
- Delete this polygon drops one you do not want.
- Clean up this outline opens shape controls for that object alone. By hand it reads Simplify this outline first and opens on Points, because thinning a 96-point outline is what makes its corners draggable.
- Undo last and Clear all walk the corrections back.
3 Shapes: clean every outline at once
The last step reshapes the whole layer, live, and touches outlines only. Shape decides how an outline is styled, Outline fine-tunes the edges.
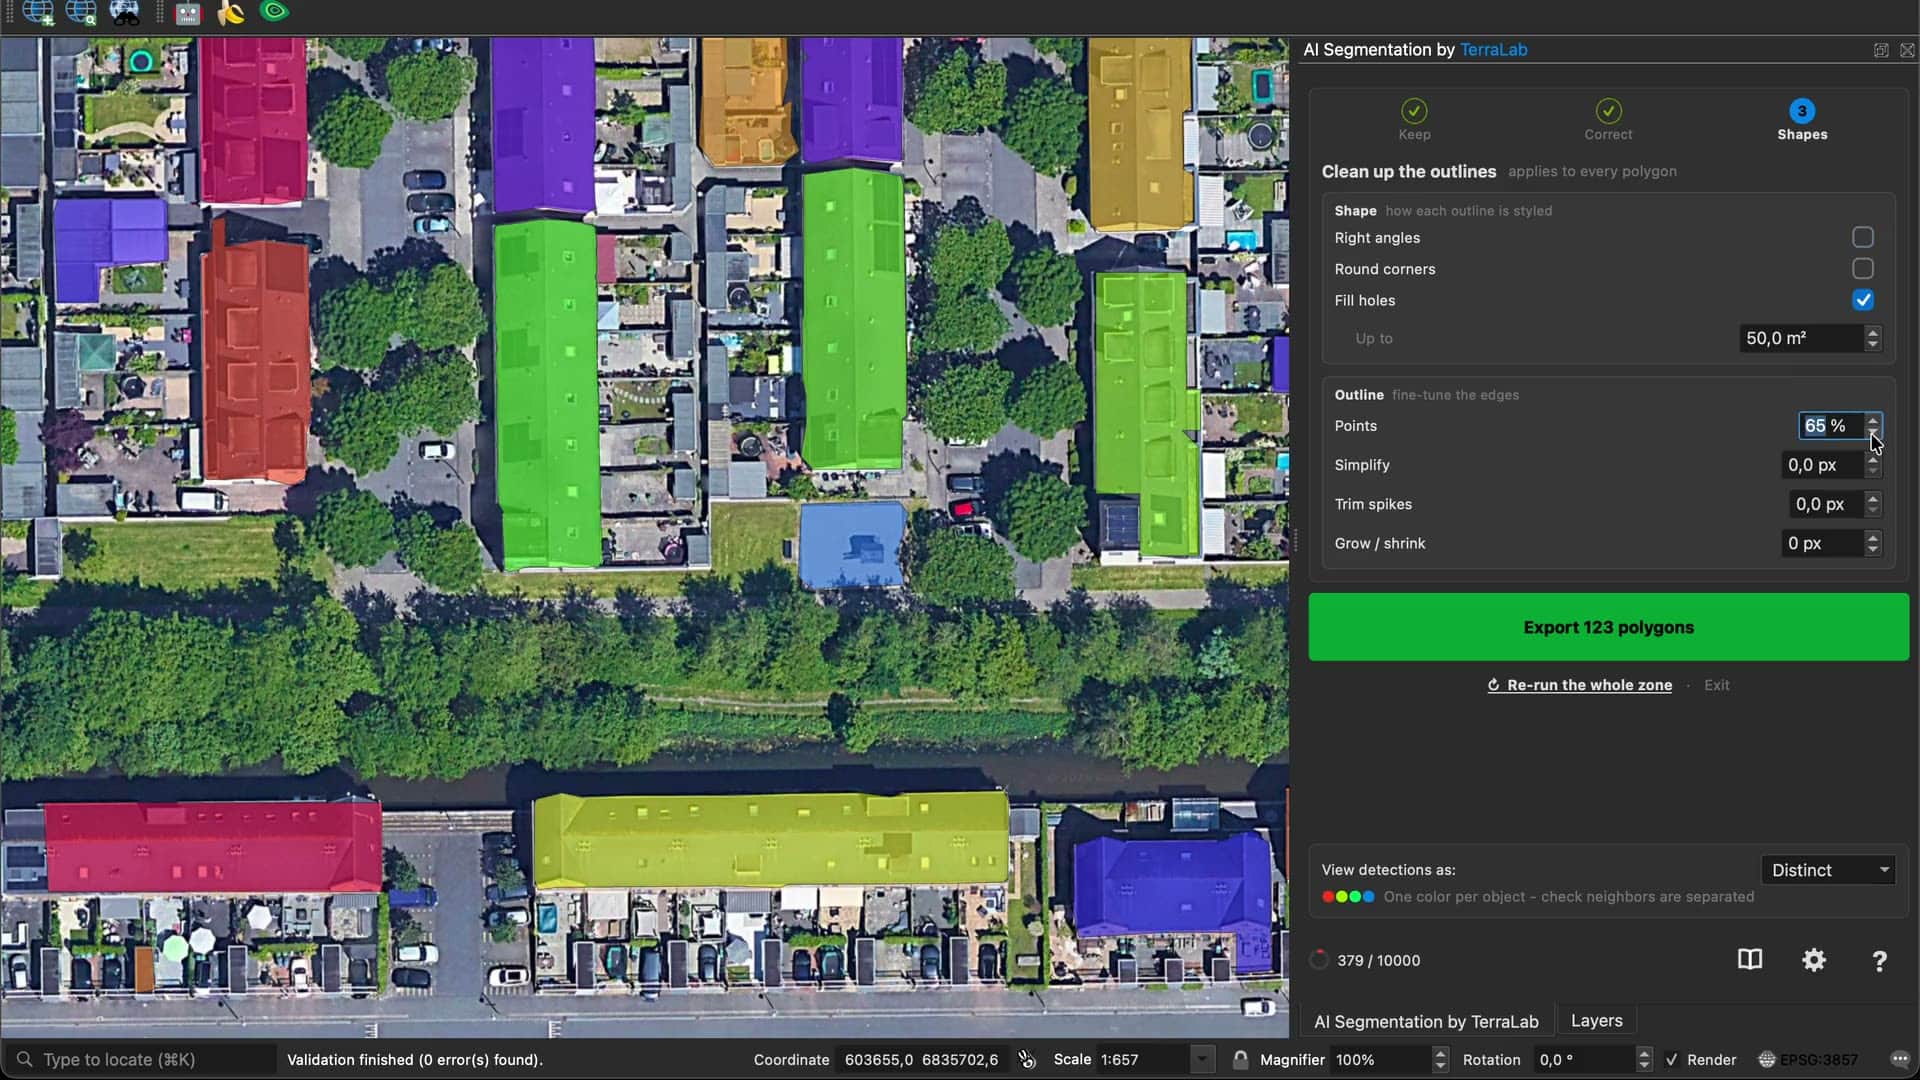
Seven controls, and you rarely touch more than two on a given run.
| Control | What it does | Reach for it when |
|---|---|---|
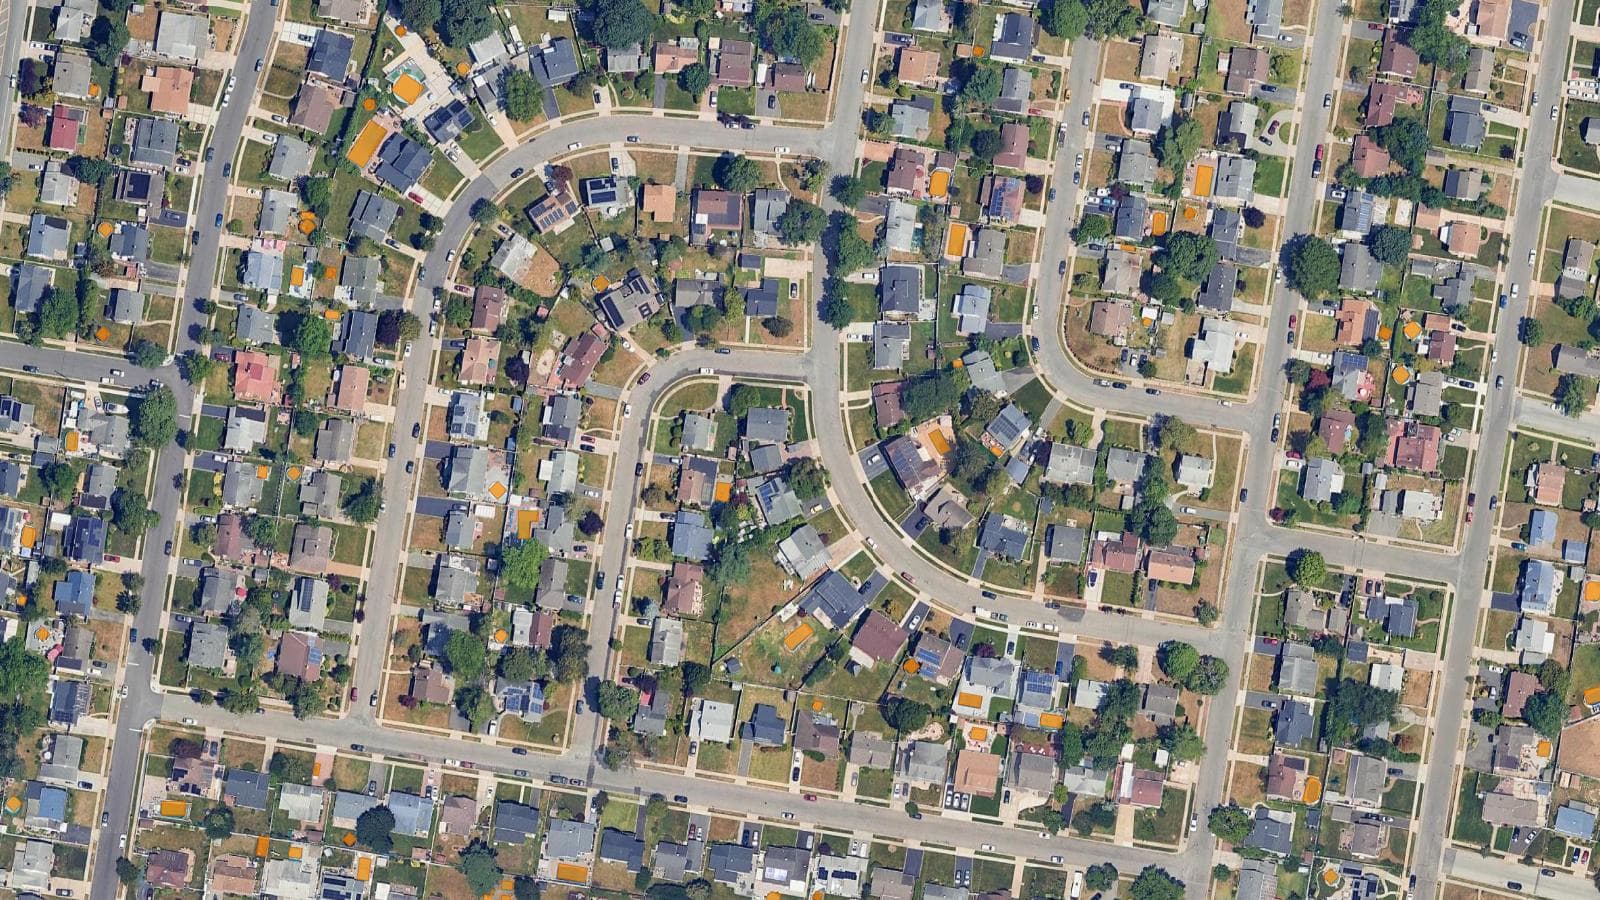
| Right angles | Snaps walls to 90 and 45 degrees | Buildings, pools, solar panels |
| Round corners | Softens the outline | Trees, bushes, anything grown |
| Fill holes | Closes interior gaps, up to a size you set | Roofs come back speckled |
| Points | Sets how many points each outline keeps | Outlines look like a pixel staircase |
| Simplify | Drops points close to a straight edge | You want the older distance-based reducer |
| Trim spikes | Shaves thin ragged bits off the edge | Objects have hairs and tendrils |
| Grow / shrink | Pushes every boundary out or in | The layer sits consistently short or long |
Right angles and Round corners are opposite choices, so ticking one greys out the other. On buildings, Right angles changes the most and Points comes next: a mask traced pixel by pixel carries a point every few centimetres, so lowering it drops the smallest detail first and keeps the corners.
One last control appears only when the run looks like land cover. Shared borders gives neighbouring shapes one exact border instead of a hairline gap. Between two buildings that gap is real data, so there the option does not exist.
Export, and go round again
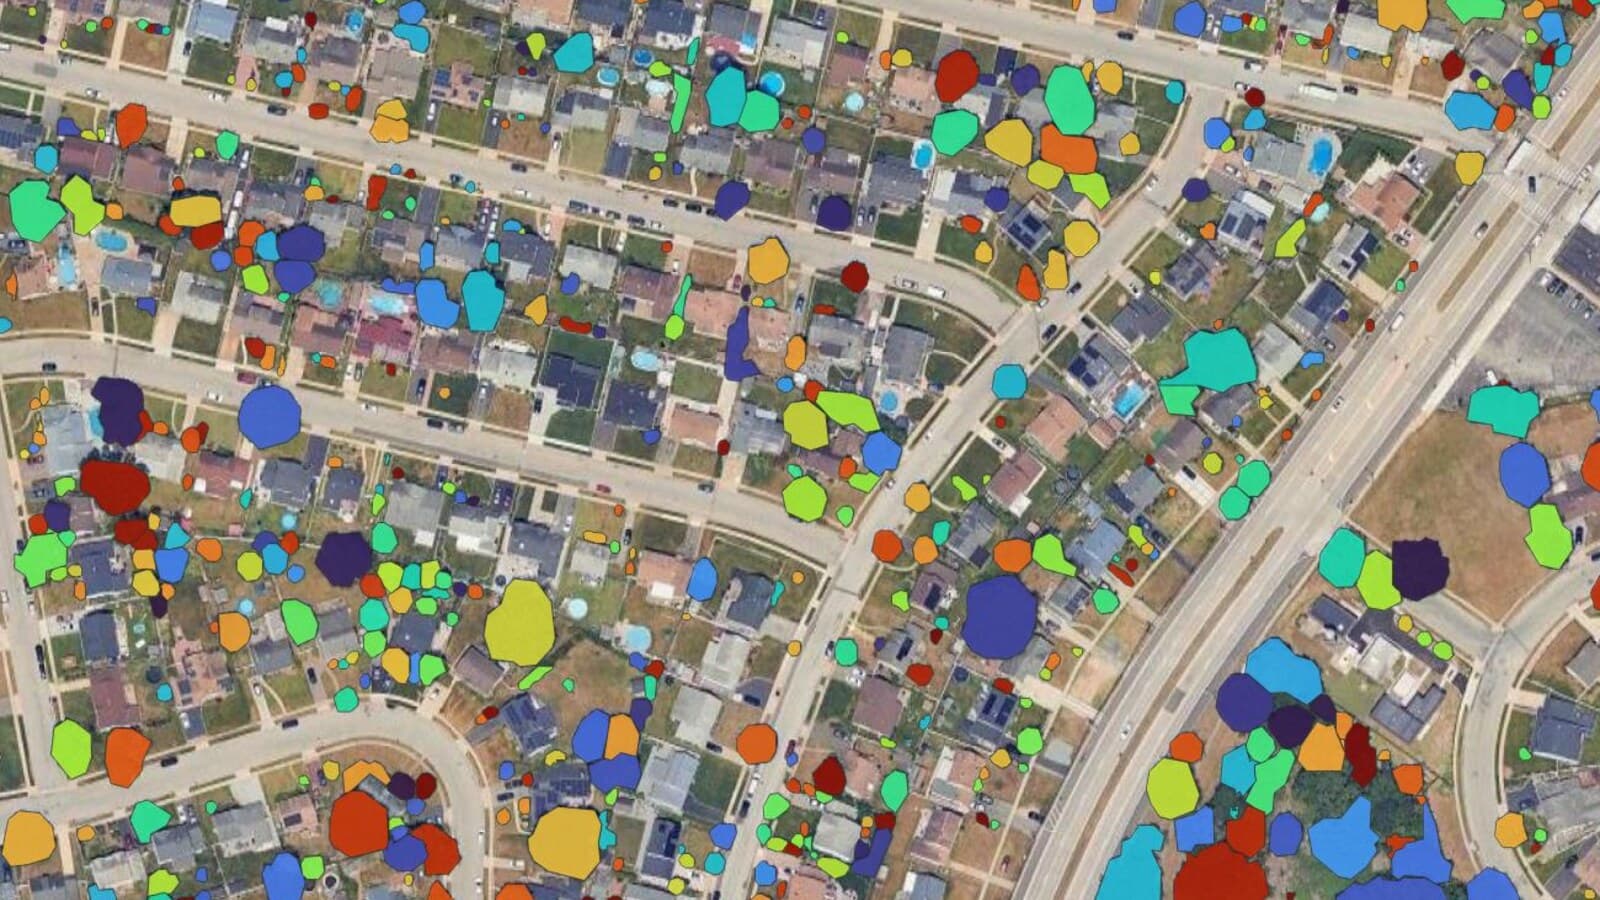
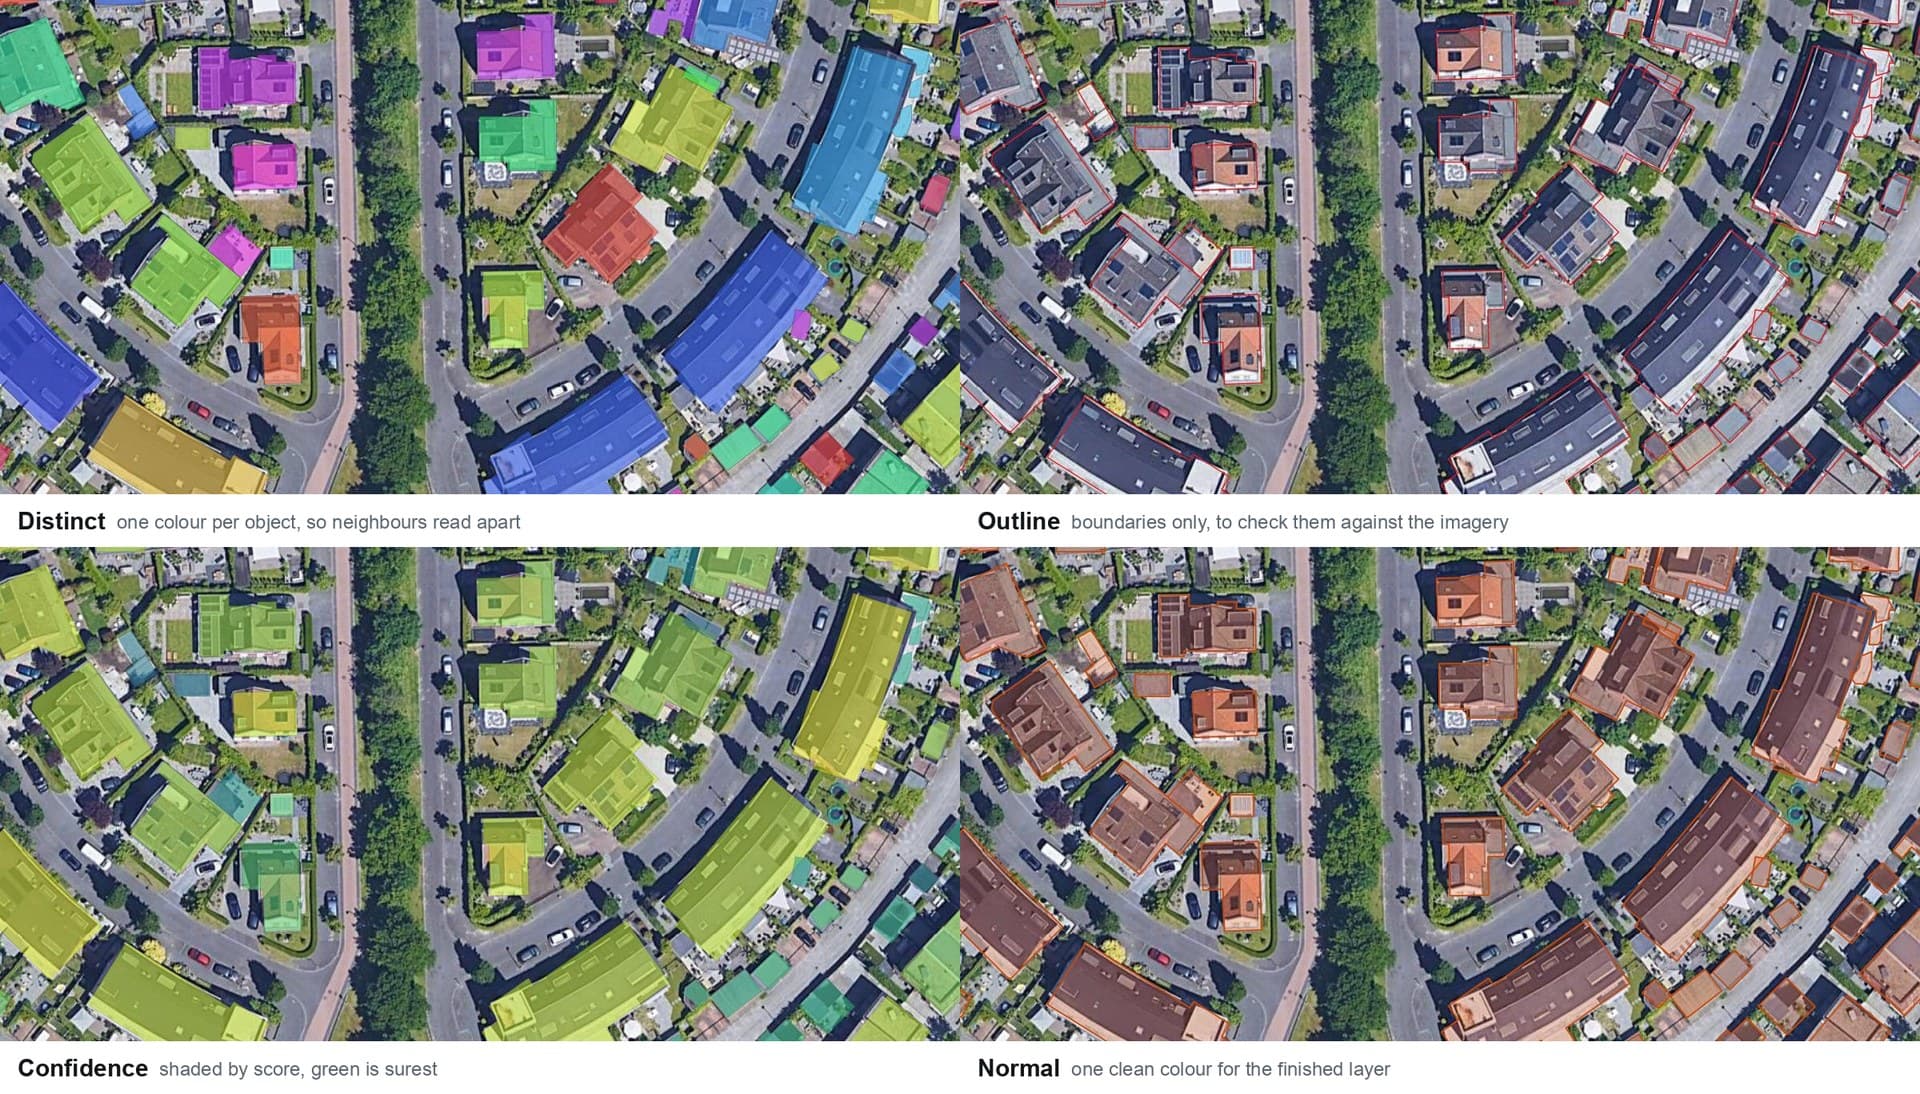
Four ways to look at the same layer. View detections as sits at the bottom of the panel through every step. It changes what you see, never the geometry.
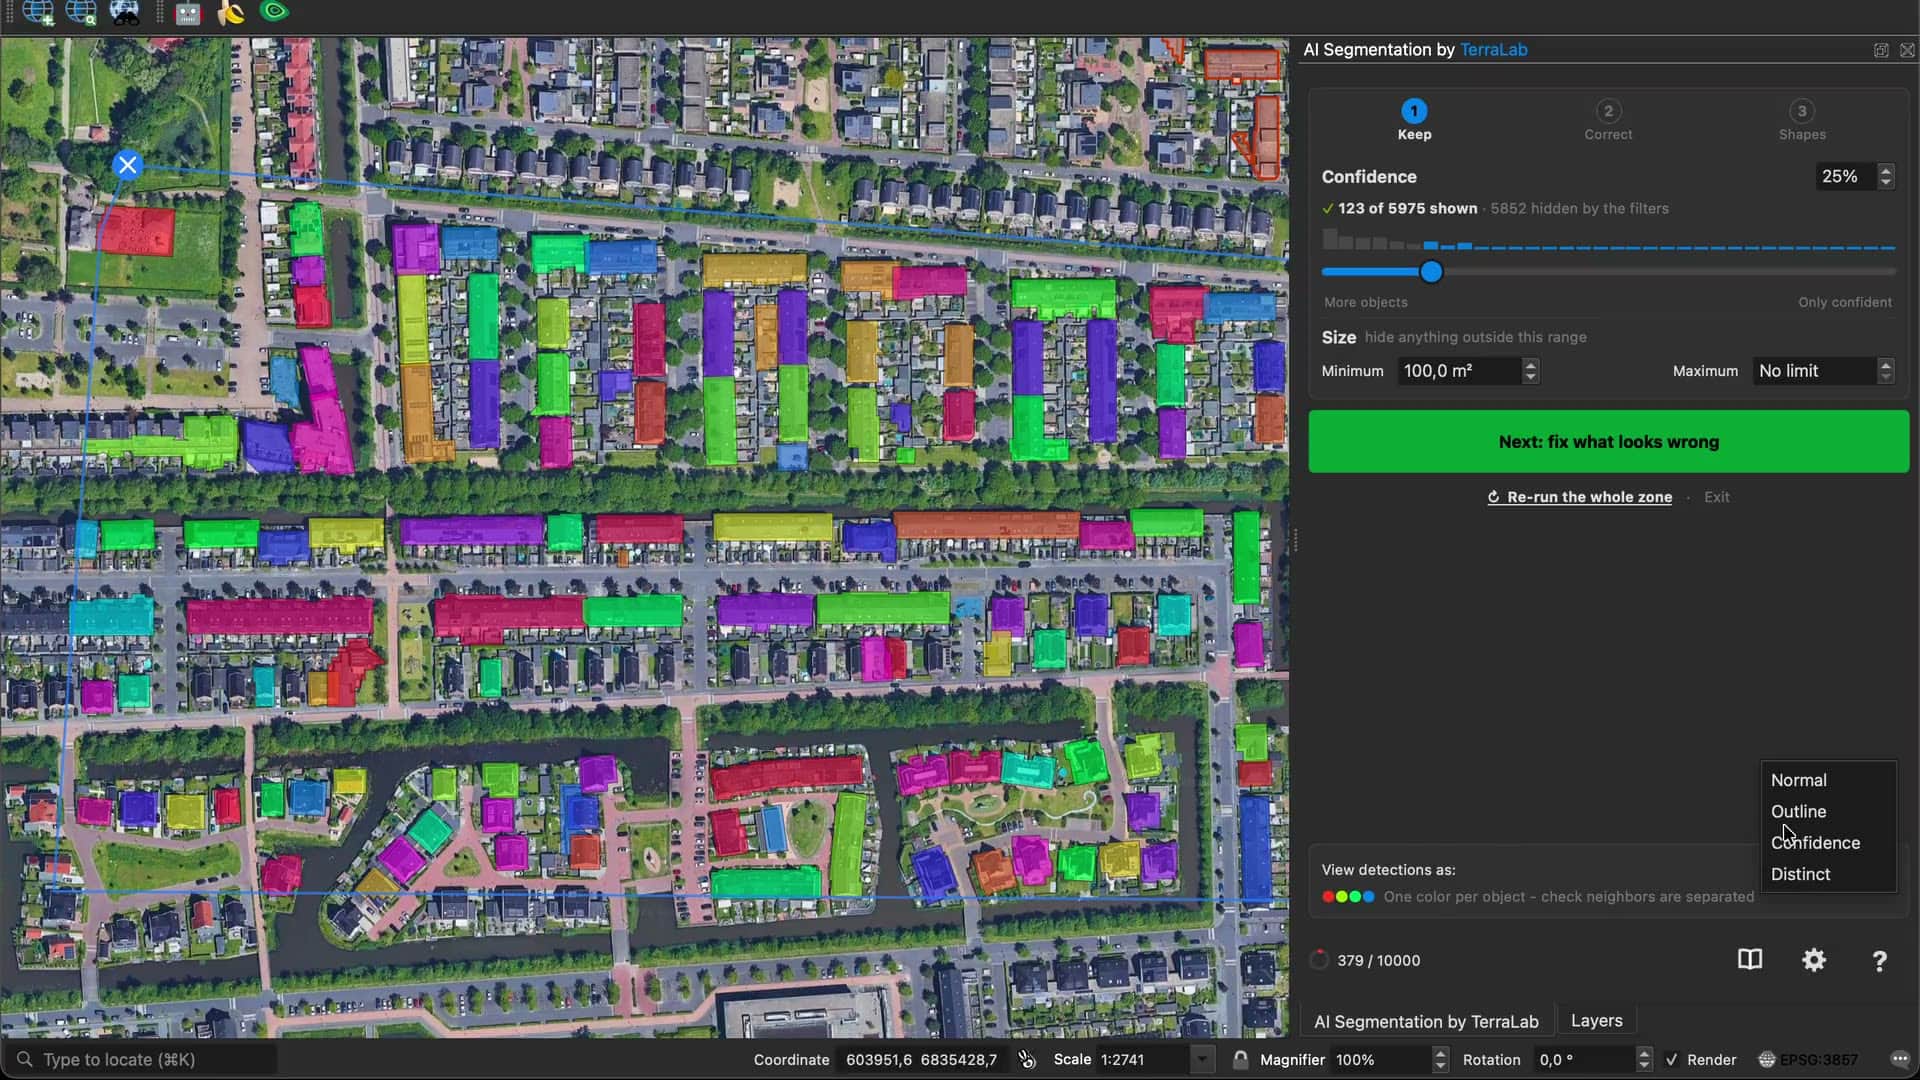
- Distinct, one colour per object, to check neighbours came out separate rather than fused.
- Outline, boundaries only, to check them against the imagery underneath.
- Confidence, shaded by score, so the Keep slider shows what you are about to lose.
- Normal, one clean colour for the finished layer.
Going back and forth is the point. A polygon you corrected becomes that polygon's new base, and the Shapes controls re-apply to it along with everything else. Go round as often as you like: it is instant and it costs nothing. The only control that spends your allowance is Re-run the whole zone, for when the wording itself was wrong.
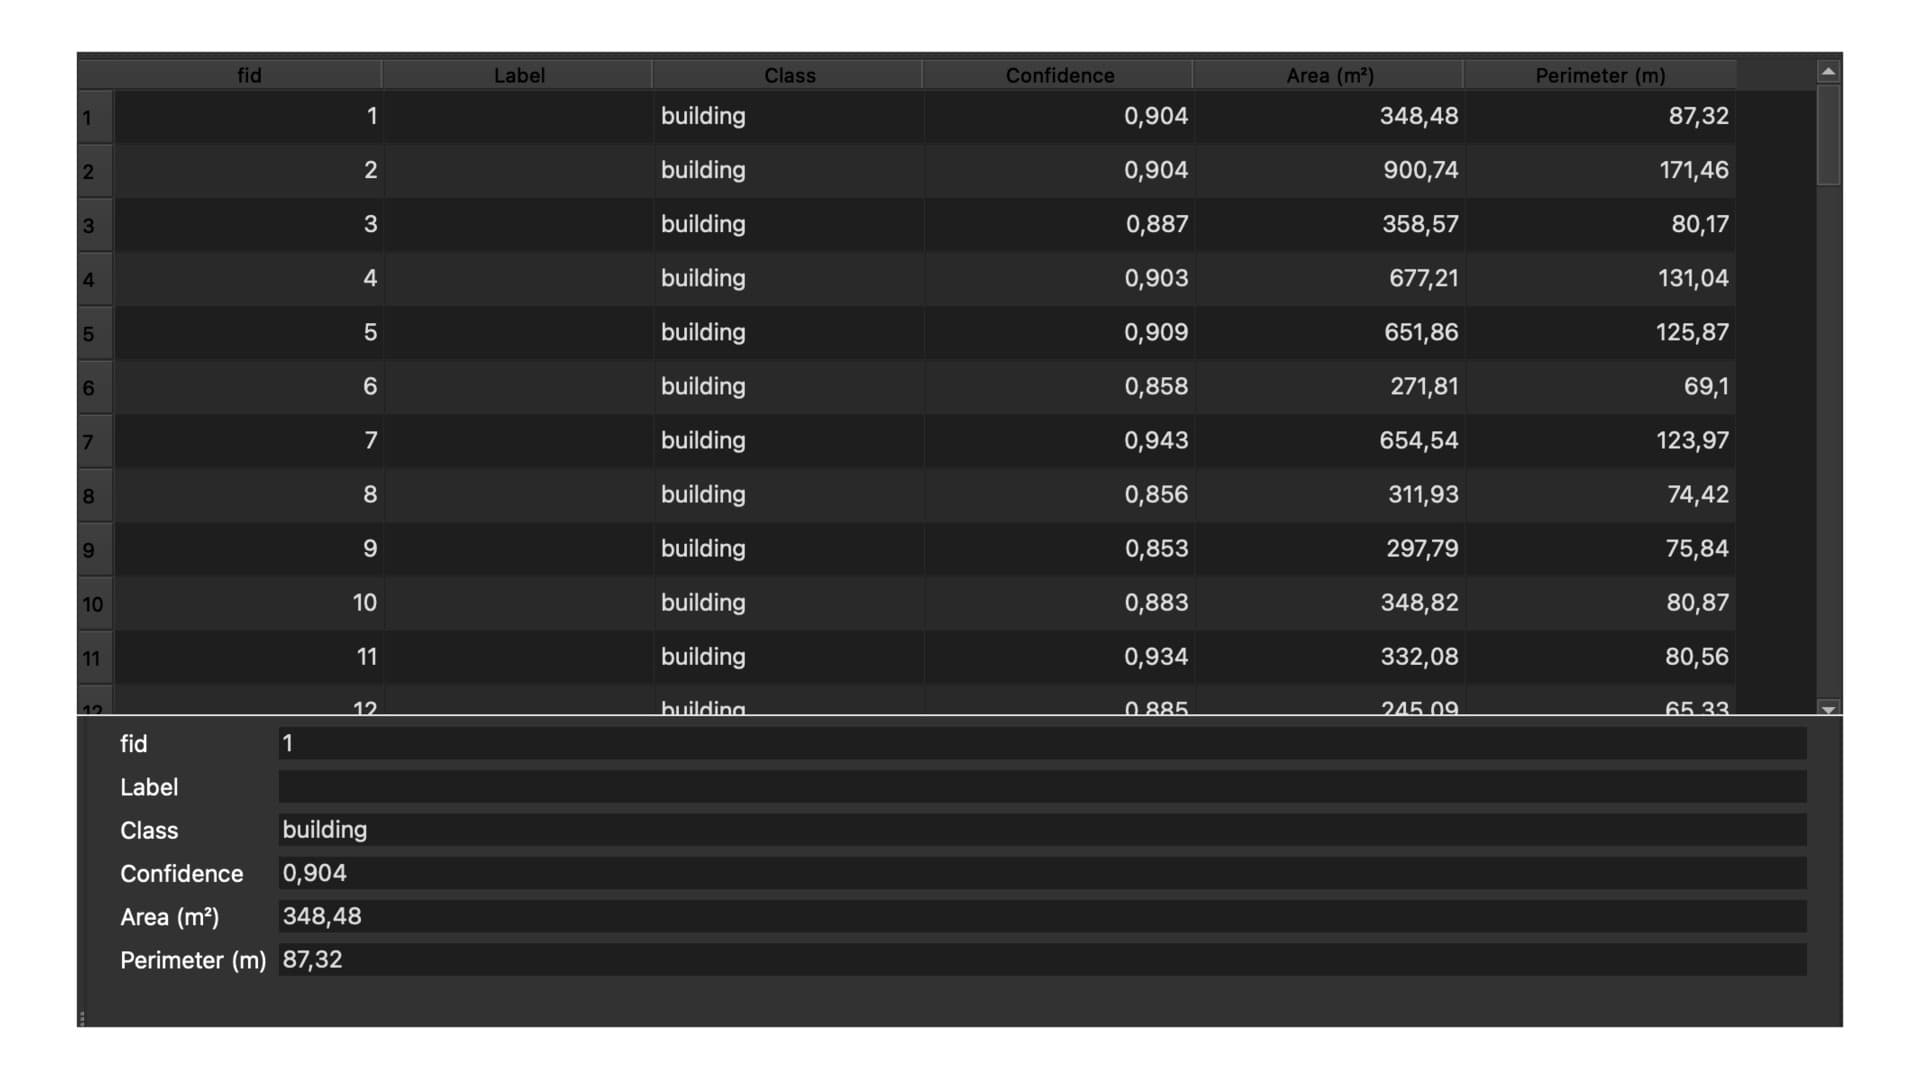
Then export. Export polygons writes a styled GeoPackage, named after the object and the date, carrying Label, Class, Confidence, Area (m²) and Perimeter (m). Areas and lengths are in ground metres, so what you read off the file agrees with what QGIS computes.
Semi-Auto: one object at a time
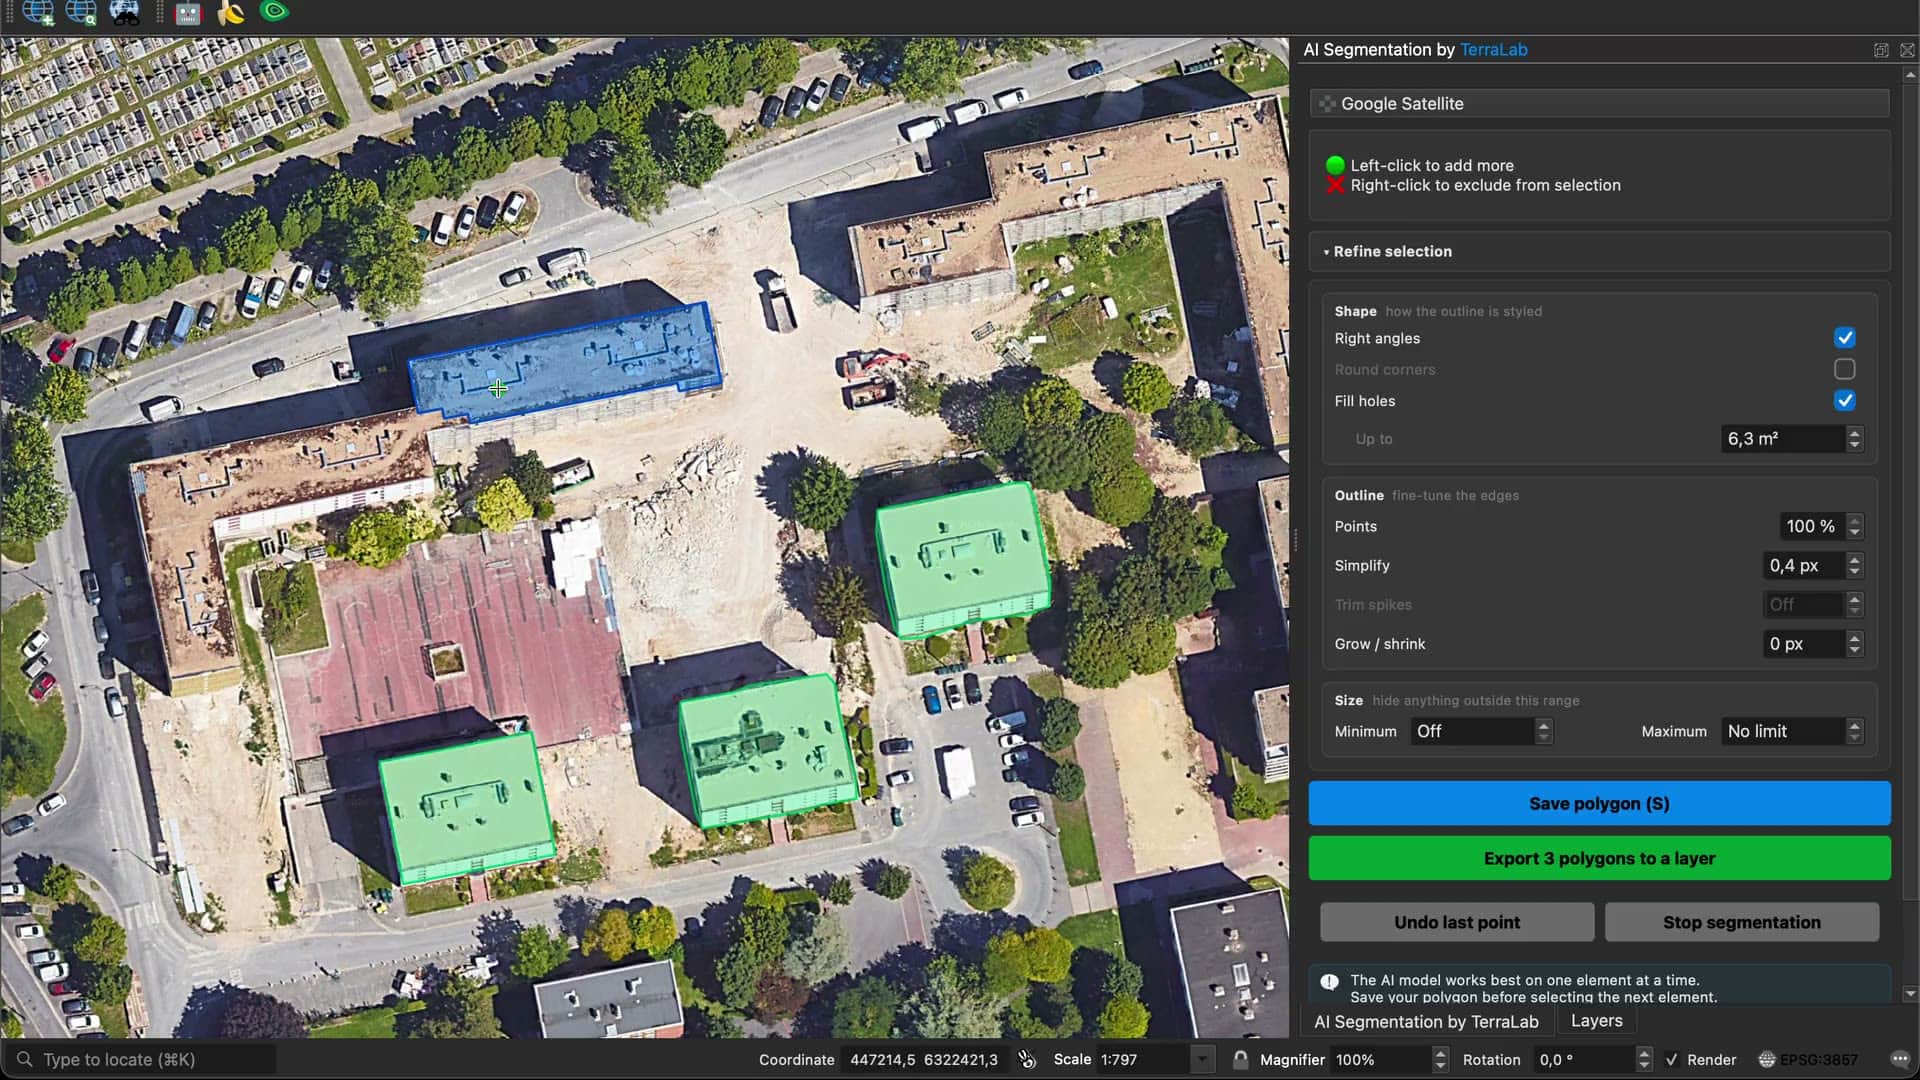
The other mode segments one object per click. Click an object and it outlines it in one shot. Left-click adds what it missed, right-click drops what it grabbed, then you save the outline.
Reach for it when you need ten exact objects rather than a thousand approximate ones, or full control over a boundary.
Two cards next to the Start button ask which AI answers the click:
- My computer. The model runs on your own machine, so nothing is sent anywhere and there is no counter. It downloads once, a few hundred MB, and it works offline afterwards.
- Cloud AI. The bigger model answers instead. Nothing to install, so you can start on your first click, and it is more accurate. Clicking is free. One object from your monthly allowance goes when you save it, and saving that same object again never counts twice.
You pick at Start, and the next session can pick the other one.
How detection works
Both modes take a text prompt and return every match in one pass. Two things about that are why this guide reads the way it does.
It takes a word. A click-based tool takes a click or a box, one object at a time. This one takes text, so building over a drawn zone is a valid prompt.
It finds every instance. A click-based tool returns the one thing under your cursor. This one returns all of them in one pass, which is what turns an afternoon of clicking into a single run.
The bill for that is hardware. A model built for this has no practical CPU path, so running it yourself needs an NVIDIA card with CUDA, which rules out every Mac, every AMD card and every laptop on integrated graphics. The next section is what we do about that.
No GPU, and nothing heavy to install
Automatic runs the model on our servers. What the plugin puts on your machine is the panel and the network calls, so the install is the ordinary QGIS plugin install and nothing else: no CUDA, no PyTorch, no model weights on disk.
A 2019 MacBook and a workstation with an RTX 4090 get the same result at the same speed, because neither of them is doing the work. The trade is that Automatic needs a connection, and the run is counted against your monthly area.
One path does stay on your machine. In Semi-Auto, the My computer card downloads a smaller model once, a few hundred MB, then answers every click offline. Nothing leaves the machine and nothing is counted. It is less accurate than the cloud model, and on a slow laptop the first click after loading takes a few seconds.
| Automatic | Semi-Auto, Cloud AI | Semi-Auto, My computer | |
|---|---|---|---|
| Graphics card | Not needed | Not needed | Not needed |
| Works offline | No | No | Yes |
| Imagery leaves your machine | Yes | Yes | No |
| Objects per action | Every match in the zone | One per click | One per click |
The free tier covers 1.5 km² of Automatic a month. Semi-Auto on your own computer has no limit at all.
Questions
Do I need a GPU for AI segmentation in QGIS?
Not with this plugin. Automatic and the Cloud AI option in Semi-Auto both run the model on our servers, so any laptop works. Only the My computer option in Semi-Auto uses your own hardware, and it runs on a plain CPU. Plugins that run this class of model locally do need an NVIDIA card with CUDA, since it has no practical CPU path.
What model does AI Segmentation use?
A detection model built for this: it accepts a text prompt and returns every matching object in one pass, which is what Automatic mode is built on.
Can it run offline?
Semi-Auto can, with the My computer option: the model downloads once and every click after that is answered locally. Automatic cannot, because the model it calls is too large to ship to a desktop.
How accurate is it on my imagery?
Clear edges give clean polygons: roofs, tree crowns, cars, water, panel arrays. A field edge fading into scrub is a judgement call, and the model hesitates exactly where you would. Resolution matters more than the sensor, and the honest test is a zone you already know by hand.
Does the imagery I run stay private?
With My computer in Semi-Auto, nothing is sent anywhere. Automatic and Cloud AI send the image tiles of the zone you drew to our servers to be segmented. They are not used to train anything.
Is there a free version?
Yes, and it does not expire. The free tier covers 1.5 km² of Automatic a month plus a monthly allowance of saved objects in Cloud Semi-Auto, and Semi-Auto on your own computer is unlimited. Pro raises both envelopes.
What to remember
Detection opens a review rather than a finished layer, and the Keep, Correct and Shapes steps can be walked in any order.
Everything in that review is instant and free, because the only control that spends your allowance again is Re-run the whole zone.
Running this class of model on your own machine needs an NVIDIA card with CUDA. Automatic runs it on our servers instead, which is why a 2019 MacBook and an RTX 4090 workstation get the same result at the same speed.
Semi-Auto with the My computer option answers every click offline, sends nothing anywhere and counts against no allowance.
The exported GeoPackage carries Label, Class, Confidence, Area (m²) and Perimeter (m), in ground metres, so the file agrees with what QGIS computes.
Try it on your own map
The test that counts is a zone you actually work on. Install AI Segmentation, run it there, and compare what comes out with what you would have digitized by hand. If anything behaves oddly, the ? button carries Contact us and Report a problem.